Monday, January 22, 2024

Tinting Green Paint Olive & An Antique Dresser Makeover

If you could describe this "before" in one word, what would it be?
Kitschy perhaps?
Once I started sanding the paint off, I actually felt some pangs of guilt! At one time, someone had used their artistic talents and hand painted those flowers on the drawer fronts. So unappreciated now, and I felt some remorse for removing all that effort with my orbital sander.


I love my Ryobi orbital by the way. I accidently bought sandnet once while in Home Depot and have been using it every since. I still use conventional sandpaper, but for my big jobs I use this for the first tough layer. It definitely has a longer life than the regular stuff! You can pull it off, shake it out, put it back on, and keep at it.


In typical Kammy style, I mixed my own paint color.  But here's a trick for ya!
I'd like to give you a second to see if you can guess what color you add to green to make the shade more "olive-y".
Brown? Wrong. Gray? Wrong. 
If you have a green paint that you would like to tint to be more of an "olive", "army" or "sage" green, you add some red! Trust me, it works! I think for this one I started with a John Deere green, added some dark gray, and little tan perhaps and the magical ingredient - RED barn paint! Can't remember the combo for sure, but don't be afraid to stir in that barn red to get the most beautiful tints of the trendy green colors!


My mother in law gave me a gift card for Hobby Lobby awhile back. I was ecstatic. Pick out ANYTHING IN THE STORE?! The decisions seem endless and overwhelming. I rarely buy any decor new. And I most certainly never buy new pulls for my refurbished furniture! But there was a great choice of boho pulls that I just couldn't resist.


It was equally hard to decide what to put new said pulls on... but I decided they looked great with this green and would do the trick on this beautiful dresser!


I gave the raw wood top a white-wash treatment (watered down white paint, then wipe it off with a rag). You can probably find a good tutorial by googling it. Cuz I'm coming up short in that department today.

If you happened to notice the painting above on the dresser, it is one of my mom's originals. 
I'm so geeled she has revived her talents after hardly painting for over two decades! If you're interested, she sells her paintings locally in Cedar Falls, Iowa or I have them in my booth at the Parma Antique Mall in Parma, Michigan.


Like it? Please do me a huge favor and pin it! :)


A peek into my booth where a few of my mom's paintings are available
top left:


Follow Kammy's Korner on:


Like what you see?  Check these posts out!


Thursday, January 18, 2024

Charming Chalkboards From Old Headboards

Is there anything more abundant on the curb than headboards??
Maybe it's just where I live.
It's probably cheese boxes in Wisconsin.


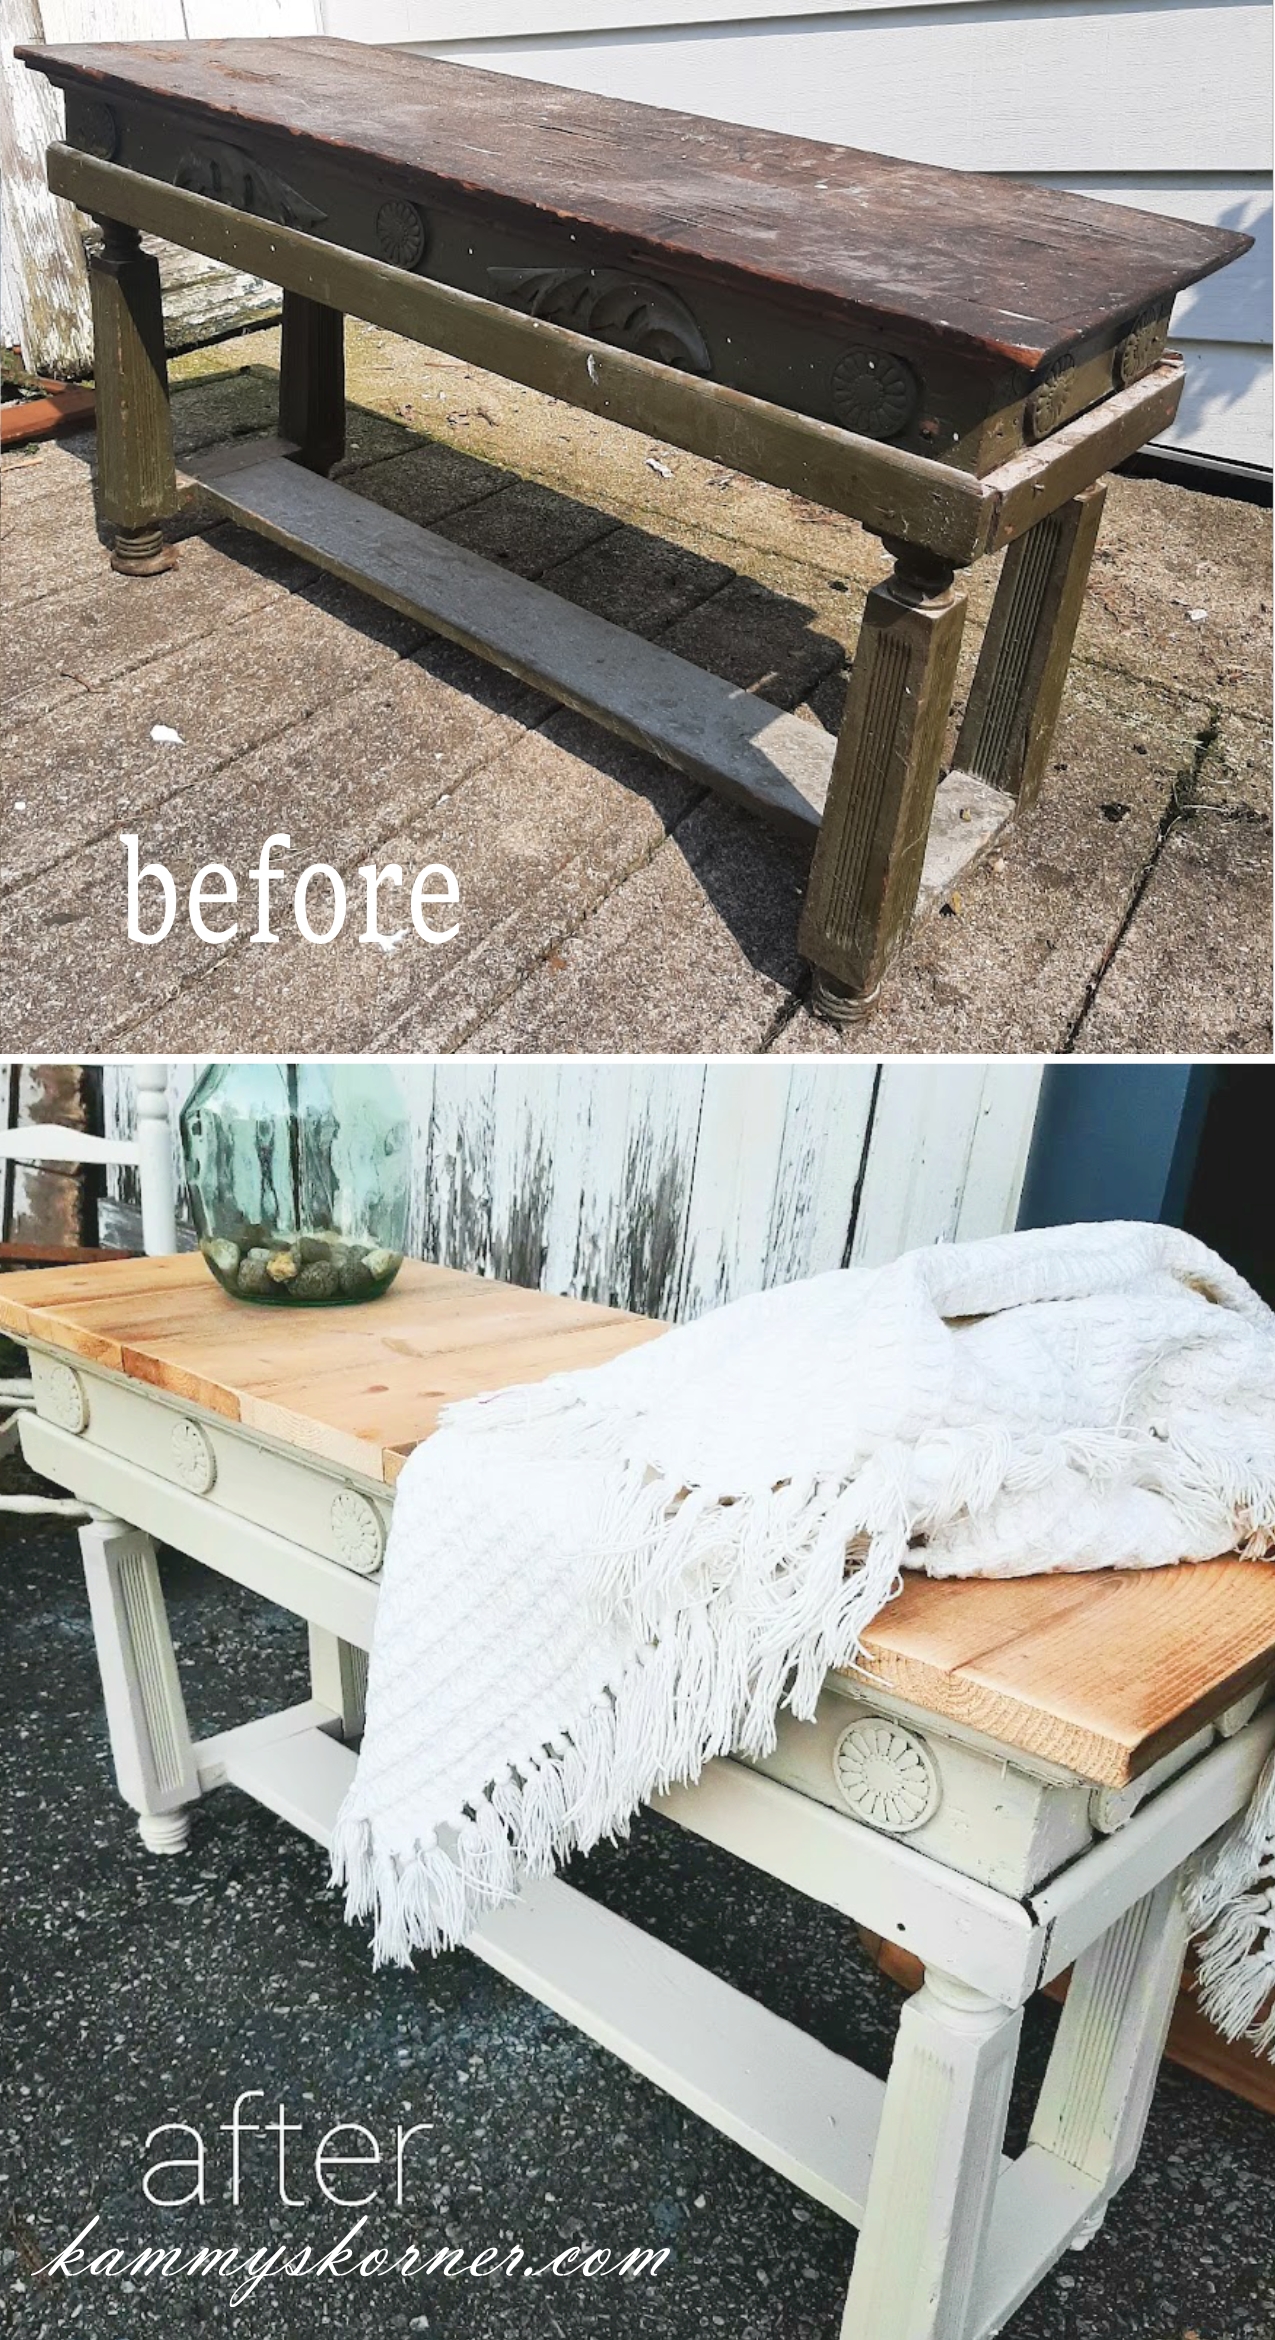
Not being one to waste anything, I pried off the wood embellishments and used them on other projects. Then using a circular saw, cut the left and right sides off. I cut a board to run the length of the bottom and using wood glue and a nail gun secured that to the bottom for a little shelf. With some white and paint for the trim and chalkboard paint for the body, here's what we've got!


Now let's move on to this dark plastic-made-to-look-like-wood beauty straight out of Grandma's house in the 1980's!
I literally stashed this in the "I'll do something with it someday" pile for ELEVEN YEARS. Folks, we don't even live at the same house as we did eleven years ago, which means it got hauled to our new place just to sit and be a home to spiders and dust for a decade! I wish I could say this was the only thing I brought from our old house and then let hang out in the barn untouched but.... Don't worry. I'll eventually get to them. Just like I did this one! Maybe.


Make the cut...


spray paint white and add the ledge at the bottom


Then after painting the main body with chalkboard paint (I got lazy and instead of making my own like normal, I bought the version Rustoleum makes). And you have a cute, useable chalkboard!!
Sorry you missed the sale being advertised on it, that happened in November of 2023.
But if you follow Kammy's Korner on Facebook, you won't miss the next one! :)

Pin It

That's yours truly on the left and my "partner in crafting" Becky from Hollow's Market on the right.

Here's my DIY recipe if you'd rather:


And here's a graphic for you pinterest board for later.
If you pin it, I'll love you even more than I do now! And that's a lot.


Follow Kammy's Korner on:


Like what you see?  Check these posts out!


Friday, March 10, 2023

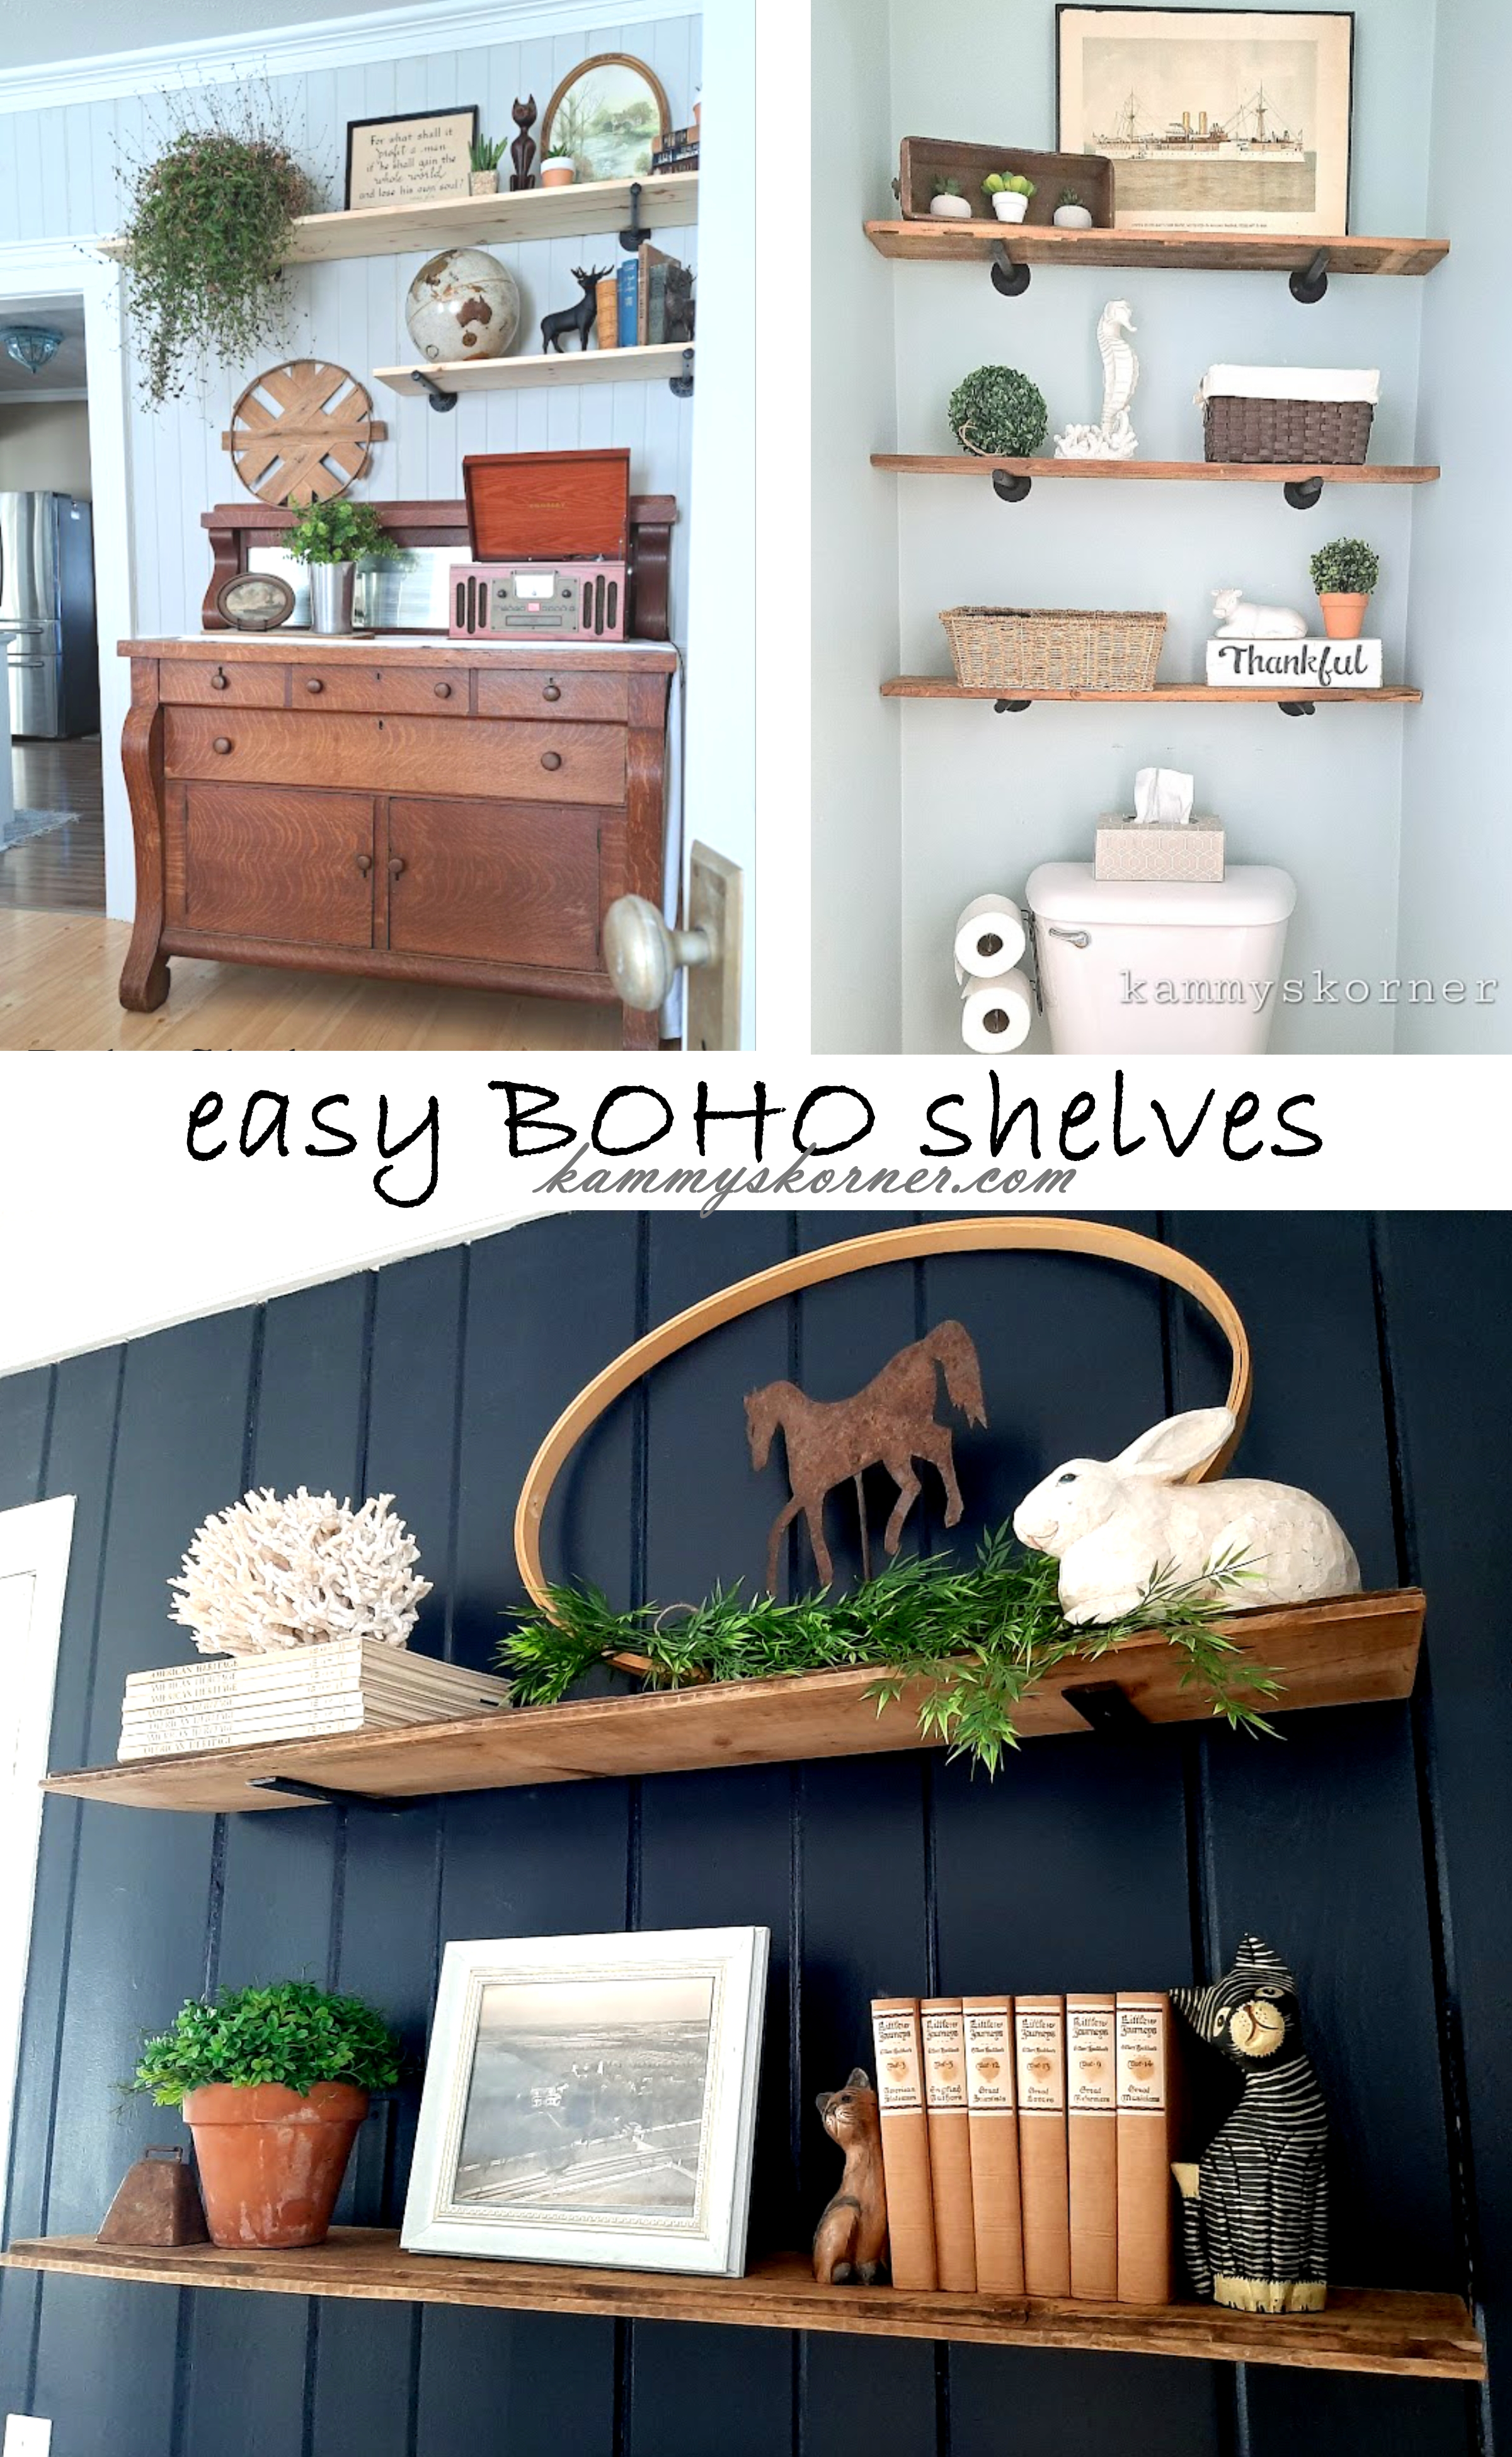
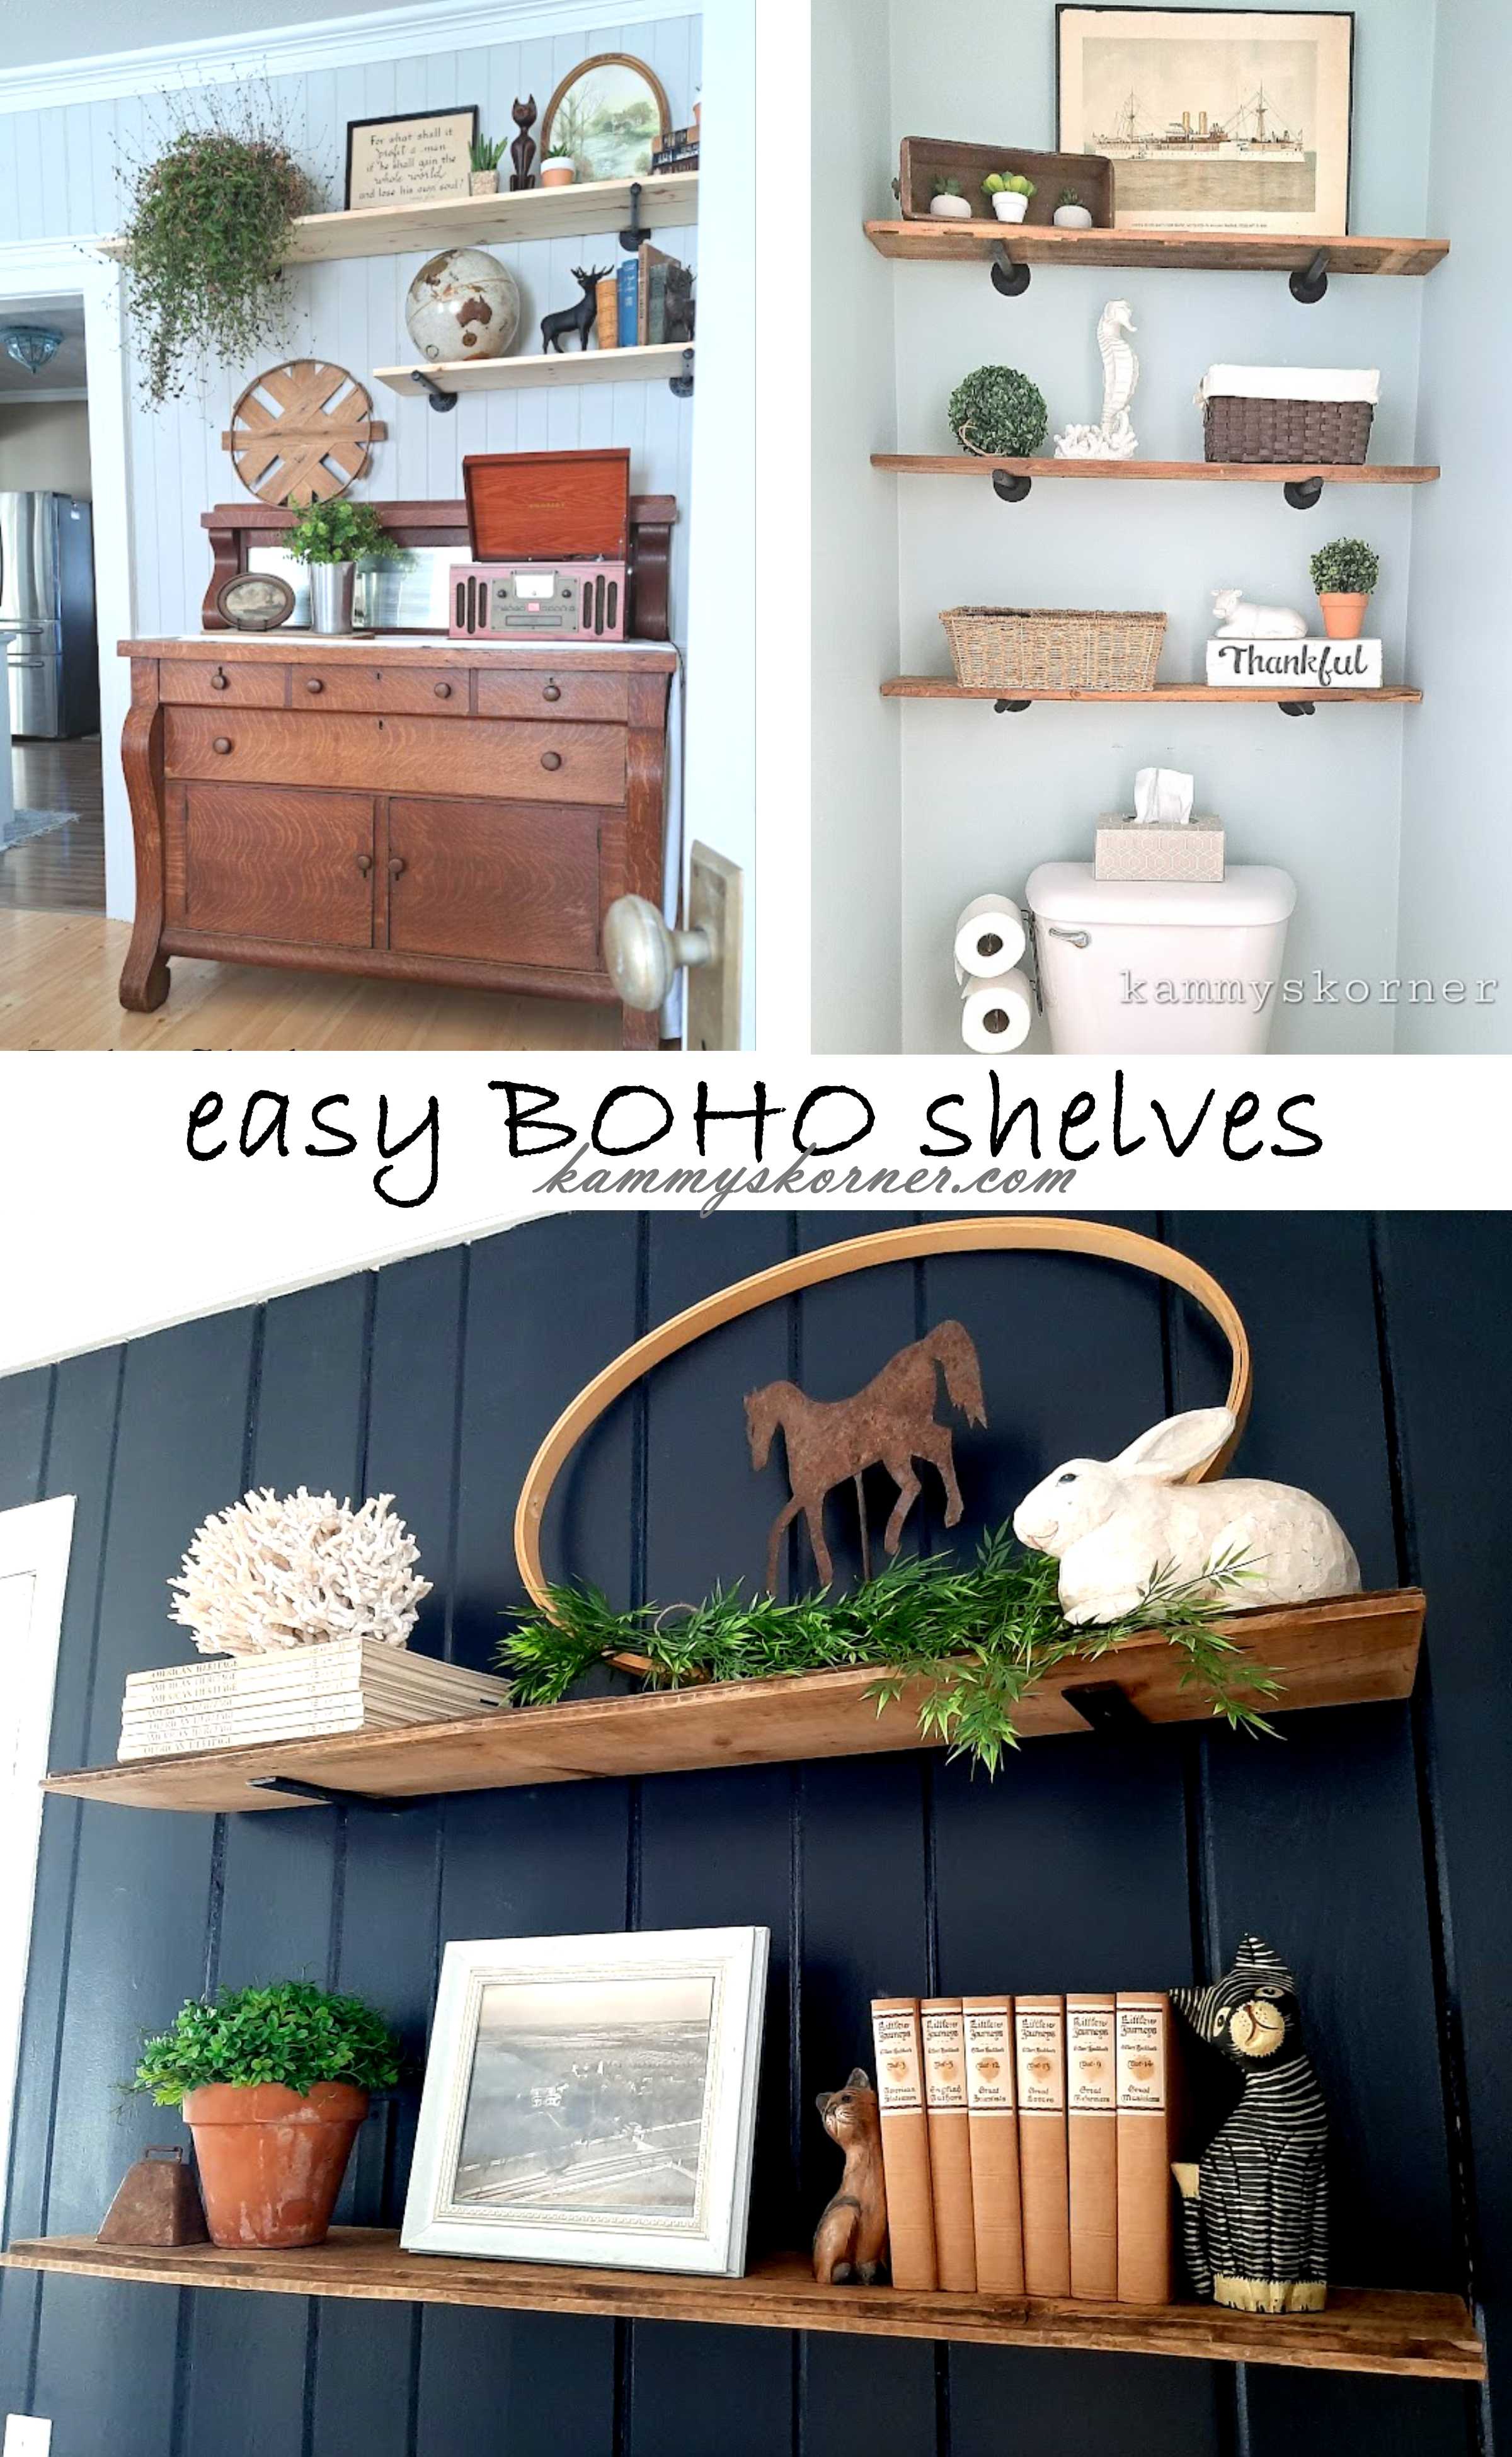
Fill Hard-To-Decorate Wall Space With Charming DIY Shelving

This has been the year for shelves in our house!
In the last 12 months, we've added wall shelves to three different rooms and I keep wondering why I didn't do it sooner.
I invite you to come have a look-see!


I had some wall space in my house where nothing looked right.

First up was this big blank space over my buffet in the family room.
I gotta tell you about this buffet before we move on to the shelves.
Someone posted it in our neighborhood facebook group as a "Free, come and get it! Would make a good workbench in a garage".  Whoa, whoa whoa. Honey, I'm there. Don't anyone be puttin' that in their garage with greasy tools! It's going straight in my family room AS IS! That's right, I didn't even dab some Old English on it. 


So it's totally against my norm, but I bought the materials for these shelves (the wood from the other projects were salvaged barn wood). These metal brackets and boards were from Menards. I had every intention of staining the wood, but once I got them up and staged them... I couldn't decide what stain I thought would look good and then the more I looked at them the more I felt the boho vibe comin' off them.... so call me lazy or call me a trendsetter, I don't give a rip. I'm leavin' 'em raw.


(Yup, records are cool now. But some of us never stopped listening to our vinyls....)


I'm not big into knick knacks taking up residence on side tables, etc. so shelves are a great way to show off things like my wood cat statues and things I pick up at yard sales that I find interesting.


Over-The-Computer-Desk Shelves

This space also always puzzled me. Everything I tried hanging on the wall felt "off" with that computer screen. 
Why did it take me so long to think of shelves? I feel like an idiot.


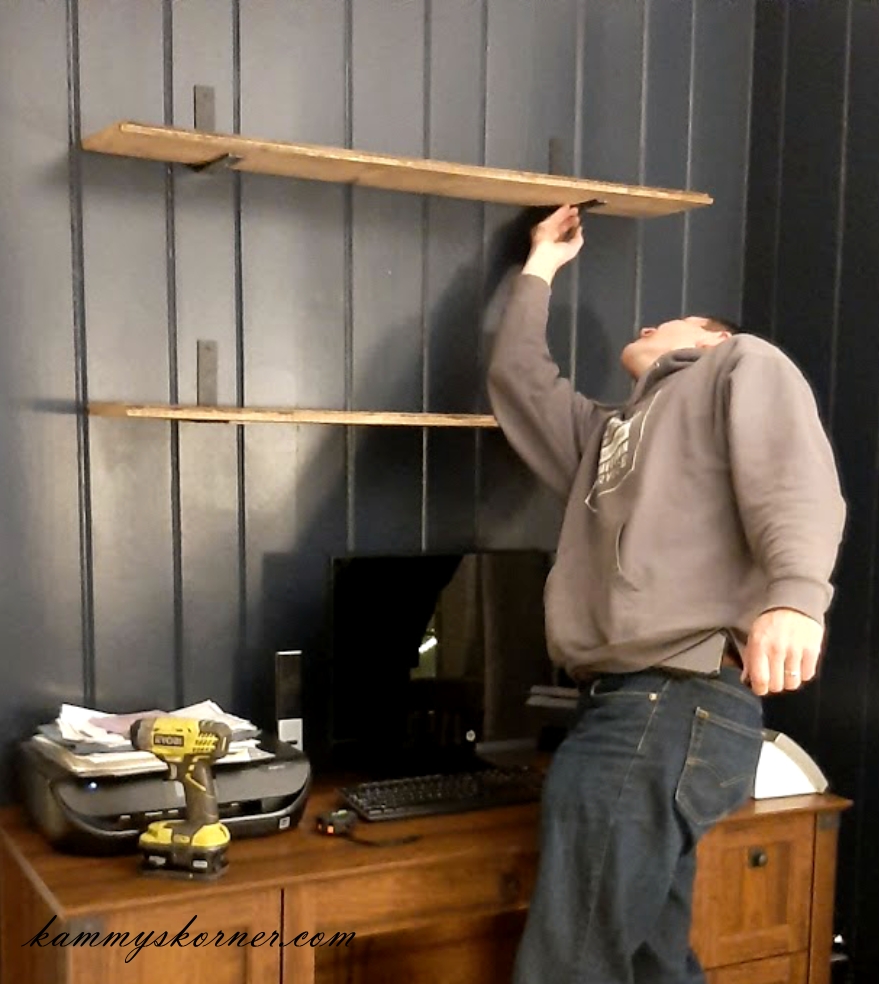
Tim ordered these metal brackets online but I wanted them to angle up so so the boards appeared to be floating shelves. They blend in with the black walls and also the objects on the shelf would hide the hardware if they didn't hang down. We had to cut off the end because it curved up and they weren't the right size. Nothing a black sharpie couldn't fix! Just colored in the cut edge. The boards were a little warped because they were from an old barn, but they had the perfect rustic patina. 


An awkward corner is now interesting and full of style! 


Click HERE to see the full living room makeover.


Last and definitely least...

Half Bath Shelves

My mom has been bugging me for yeeeears to put shelves over the toilet in our half bath.
So I did have a few fleeting anxious thoughts of not having cabinet doors to hide bathroom-y things behind... but there is this ancient old invention that we still use today - 
BASKETS. This "before"  photo is about 10 years old... I had painted over the subway art a few years back, but this is the only before photo I could find. (I really went through a phase where I subway arted everything!)


Yup, so much cuter now! You were right, Mom!
Again, those are made with salvaged wood. These particular ones came from a friend who tore down his garden shed and donated them to my stash. 
I'll always be grateful to all the folks who call me before starting their fire!


Got a spot on your walls you want to add shelves to after seeing this?
I hope you've been inspired!
Pin this post for future reference!
And I'd love to see YOUR shelves!
Pin It


Follow Kammy's Korner on:


Like what you see?  Check these posts out!


Wednesday, October 12, 2022

Repurposed Antique Stereo And Vintage Painting (Print)


Welcome to the stereo redo!
This one took a little elbow grease. 
Elbow grease? Sometimes phrases hit me weird when I type them out. I just googled "elbow grease" and found it was first published in a satirical book on the English parliament in 1672.

Let's see the "BEFORE" photos so you can see what I mean!


The front part pulled out at an angle to reveal a record player. I cut all the wires, unscrewed all the screws, and then called in the big guns (my 16 year old son) to put one foot the top corner of the door, while I put my foot on the other corner and on the count of three we jumped. The door cracked off, the turntable went sailing, I screamed, and Tobin said "Am I done?"


I deeply regret not taking more photos of the makeover process. I used a wet rag and a hot iron to get the very damaged veneer off the top. You can see a short video tutorial on how to do that HERE. (Link will take you to my facebook page where the video is uploaded).

I had just happened to pick up some scrap wood from an older gentleman who stopped me on Main Street and told me to come help him clean his garage out. I took a whole load home and promptly put some of the boards to use as the "floor" in the stereo cabinet.


I was scanning my shop for a piece of wood I could use across the back when my eyes landed on an old framed painting. I loved the idea of using it for the back after holding it up and seeing the uniqueness but I was afraid others wouldn't go for it. After searching for a few minutes and finding nothing suitable, I decided the painting was the way to go!  I used my miter saw to cut it down to size. I have discovered the hard way that it's never a good idea to cut anything other than wood with this powerful tool... but this was thick enough that it didn't cause me any more gray hairs and actually cut nicely.


Darn. I had to cut off that cute little barn.
I used my cordless Ryobi staple gun to attach it to the back.


Now if I only I had that 4th knob........

Like it? Pin it!


This, along with many other furniture upcycles and decor will be for sale in my barn on November 4th & 5th!
Check out the details here:


A couple more makeovers that will be for sale in the barn:


Follow Kammy's Korner on:


Like what you see?  Check these posts out!